Getting Started with PostGenie
PostGenie discovers content from feeds you follow, scores it for relevance, and drafts LinkedIn posts in your voice. Here’s how to get up and running in a few minutes.
1. Create Your Account
Click Register in the top navigation bar and fill in your name, company, and email. You can also sign in with Google if you prefer.
2. Add Your Content Feeds
After logging in, click Feeds in the top navigation bar. This is your content feed dashboard. Click the Add Feed button in the top-right corner to add RSS feeds, YouTube channels, or websites you want PostGenie to follow. You can also paste a URL directly using the Instant button to process a single article right away. We have already set up a few feeds for you as examples. Feel free to delete them.
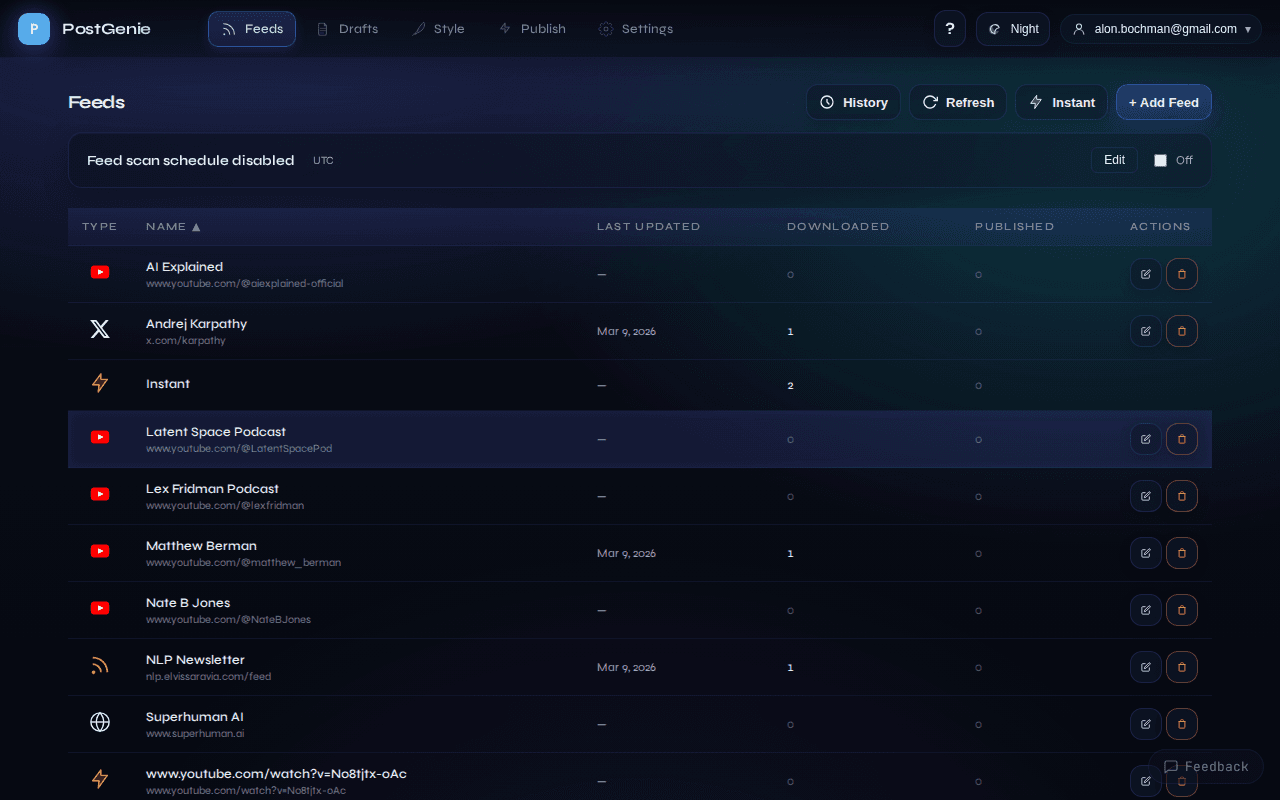
3. Run a Scan
Once you have feeds, click the Refresh button on the Feeds page to start a batch scan. PostGenie will fetch recent content from all your feeds, score each item for relevance to your interests, and create drafts from the best matches. You can also click History to see past scan runs and their status.
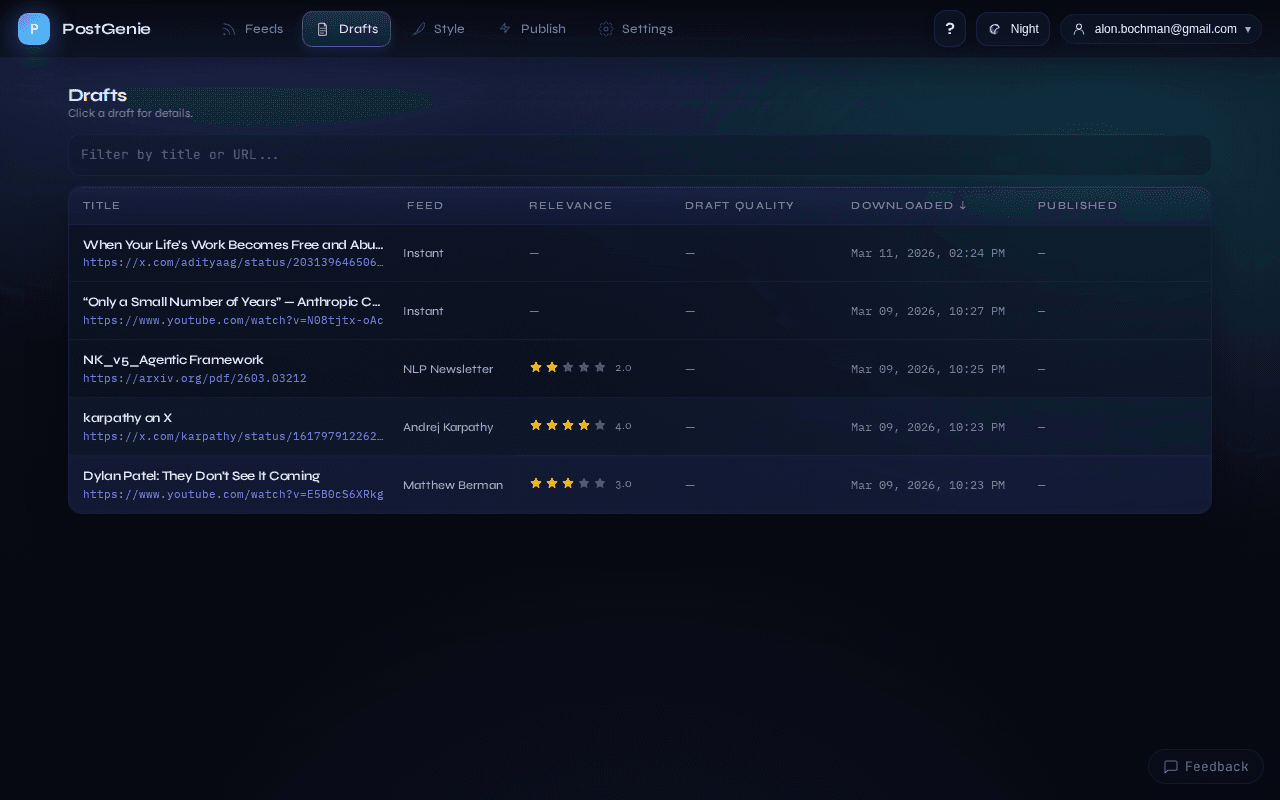
4. Review and Refine Drafts
Click Drafts in the top navigation bar to see every post PostGenie has generated. The table shows each draft’s title, feed, relevance score, and quality score. You can sort by any column, up or down.
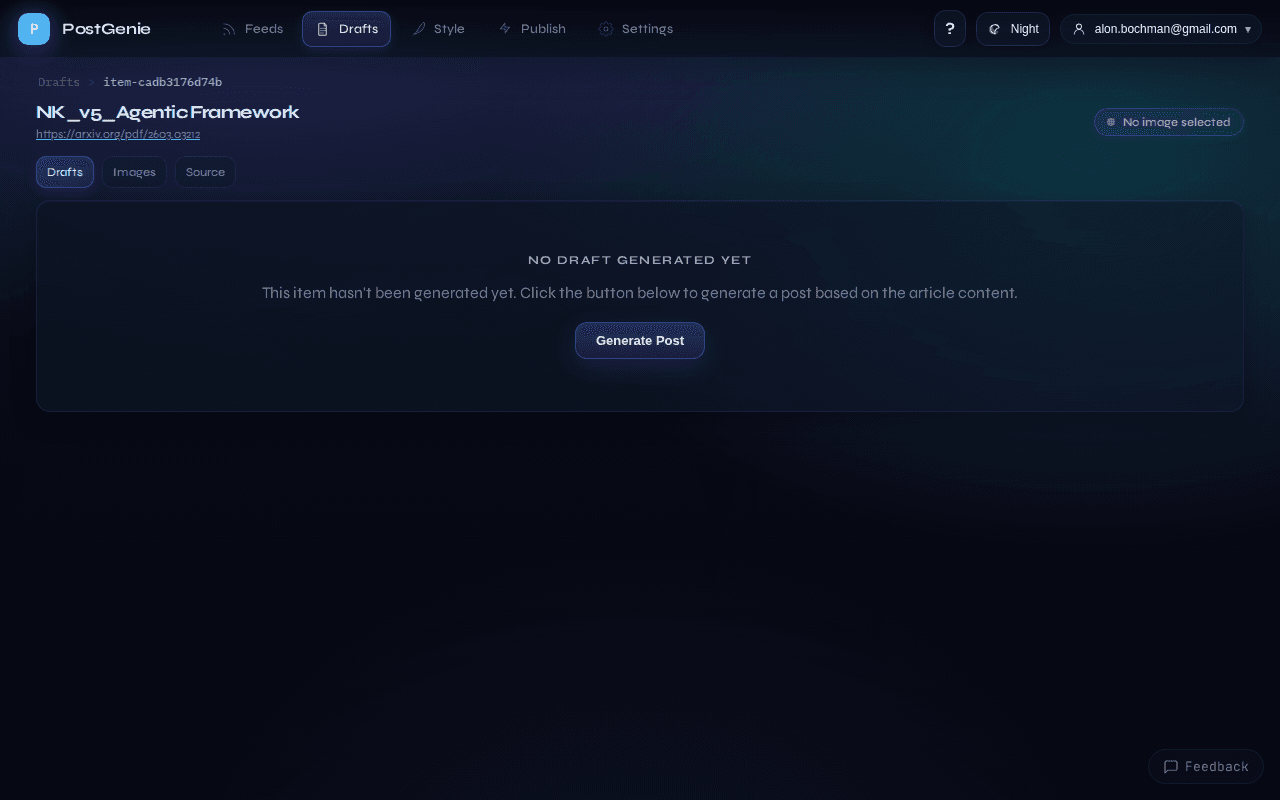
Click any draft to open the detail view. If the post hasn’t been generated yet (because it didn't pass the relevance threshold), click Generate Post. Once generated, you can refine it using the toolbar buttons:
Once a post is generated, additional functionality becomes available:
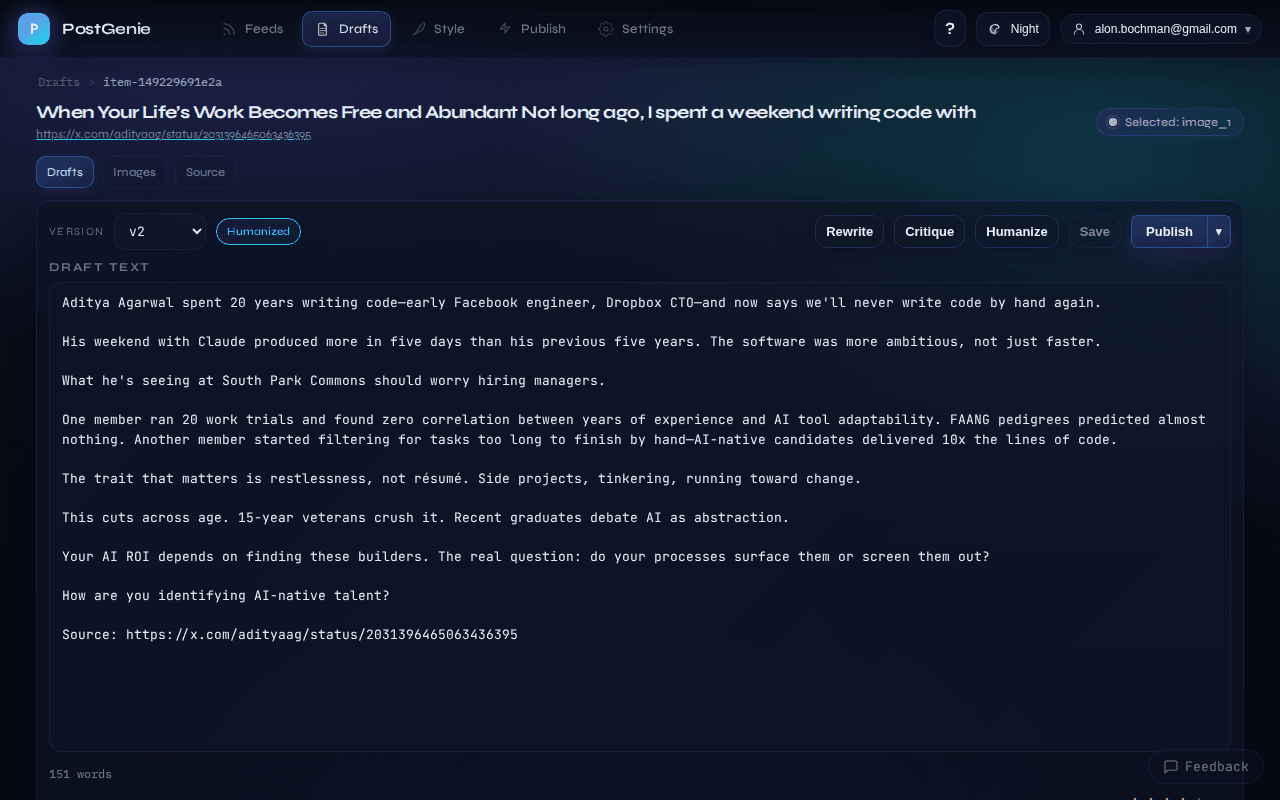
- Edit the text directly in the editor.
- Critique — ask the AI to analyze the draft and suggest improvements.
- Improve — apply the critique automatically to create a better version.
- Humanize — rewrite to remove any AI-sounding patterns.
- Click the Images tab to generate or search for images from the meme bank, Unsplash, or AI-generated options.
- Click the Source tab to read the original article that inspired the draft.
Every change is saved as a new version, so you can always revert to an earlier draft using the version dropdown.
5. Customize Your Style Guide
Click Style in the top navigation bar. The Input tab lets you describe your voice so PostGenie writes posts that sound like you:
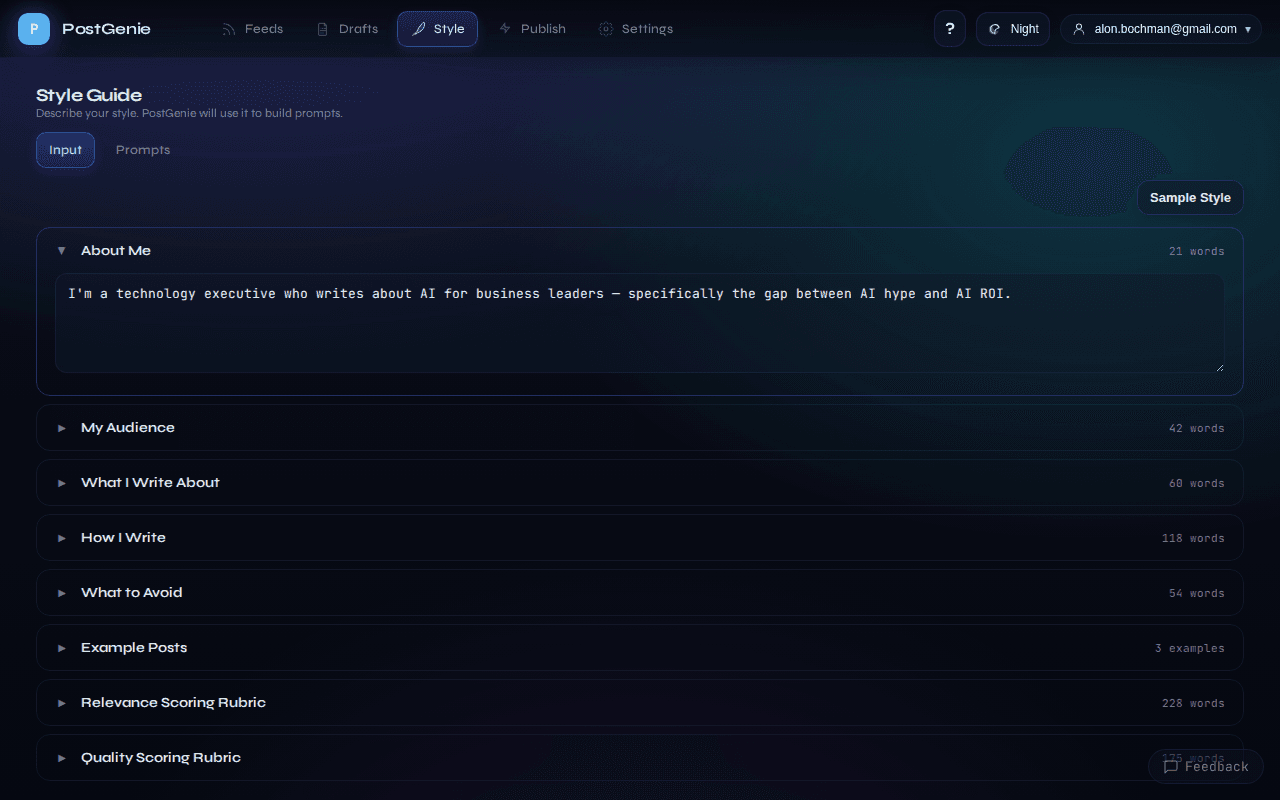
- Fill in cards for About Me, My Audience, What I Write About, How I Write, and What to Avoid. The more specific you are, the better PostGenie will do writing in your voice.
- (Optional) Paste example LinkedIn posts you like under Example Posts so the AI learns your voice.
- Click Save & Generate Prompts at the bottom to rebuild all prompts from your inputs.
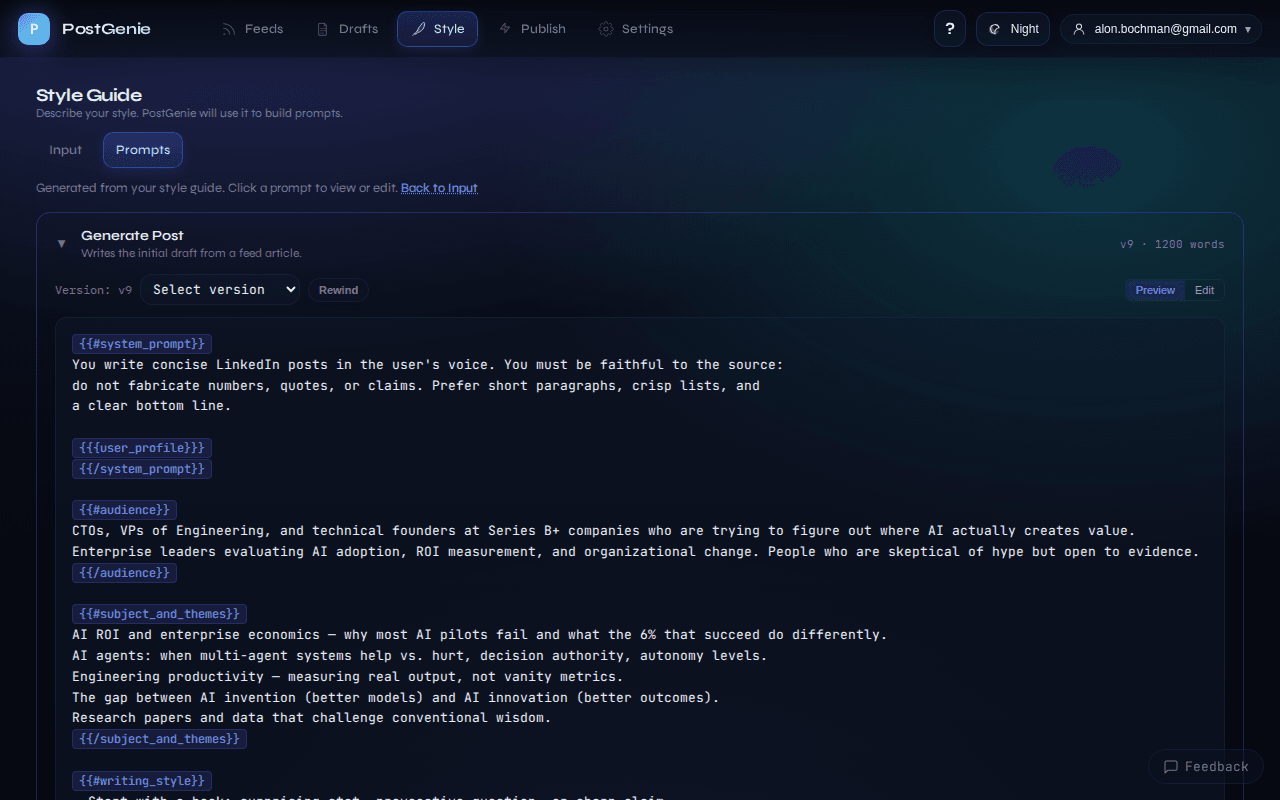
Switch to the Prompts tab to view or directly edit the underlying LLM prompts if you want full control over how PostGenie generates, critiques, and improves your posts. This view is available in
6. Publish to LinkedIn
When a draft is ready, click Publish to Buffer in the draft detail view. PostGenie uploads the post and image to your Buffer queue, where you can schedule it for LinkedIn. To set up publishing, first connect your Buffer account — go to Settings in the top navigation bar and scroll down to the Connections section.
7. Configure Your Settings
Click Settings in the top navigation bar to control how the pipeline behaves:
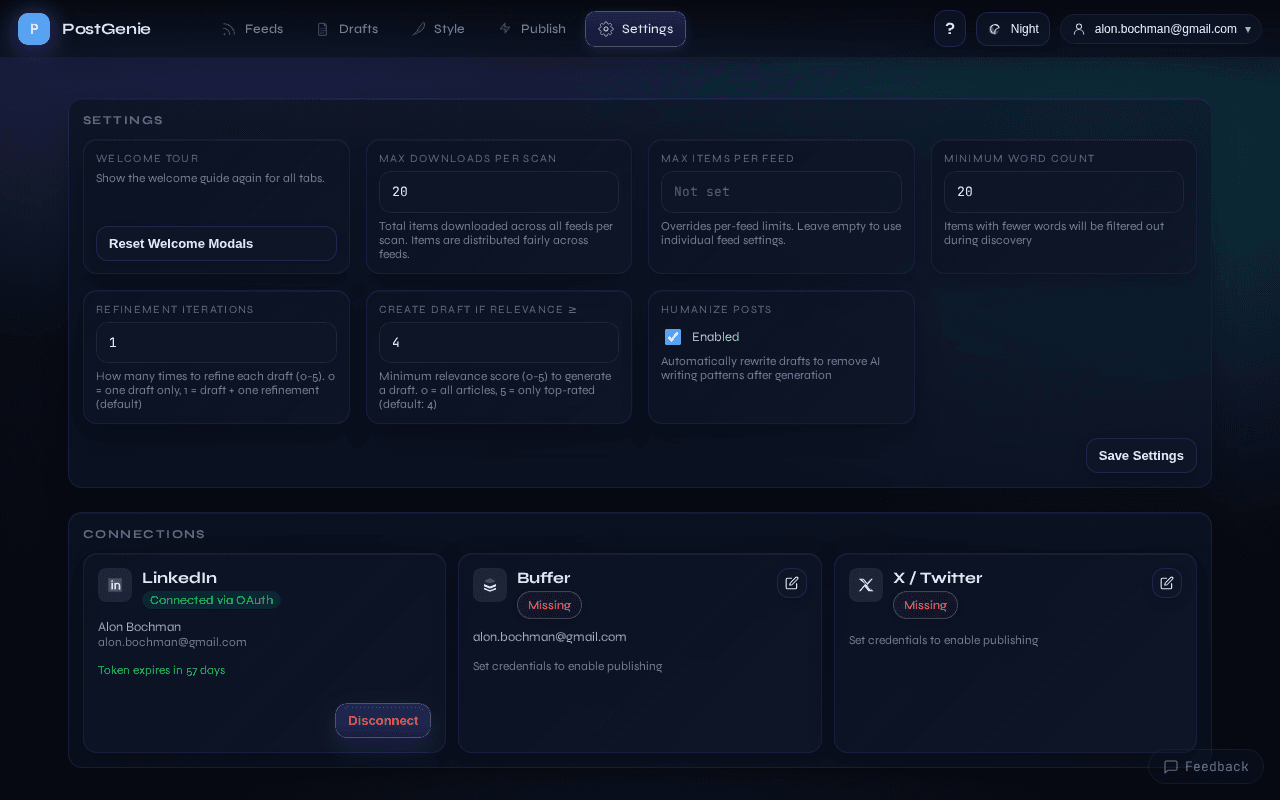
- Max Downloads per Scan — how many items to fetch across all feeds in a single run.
- Max Items per Feed — optional per-feed limit to keep any single feed from dominating.
- Minimum Word Count — filter out short articles that don’t have enough substance.
- Refinement Iterations — how many critique/improve rounds to run automatically on each draft (0-5).
- Create Draft if Relevance ≥ — minimum relevance score (1-5) an item needs to become a draft.
- Humanize Posts — toggle automatic rewriting to sound more natural.
The Connections section at the bottom lets you connect your LinkedIn, Buffer, and Twitter/X accounts.
Need More Help?
Have a question or run into an issue? Contact us and we’ll get back to you.